Showing posts with label cards. Show all posts

Tuesday, July 30, 2013

House Of Cards

Wow...a long time has passed since my last post.  That is a result of being a mom of twins.  Once upon a time, I was a lady of leisure.  I had a ton of time - I can't tell you what I did with all that extra time.  How things change...
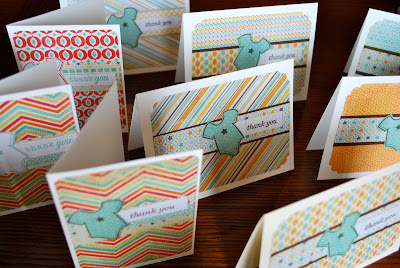
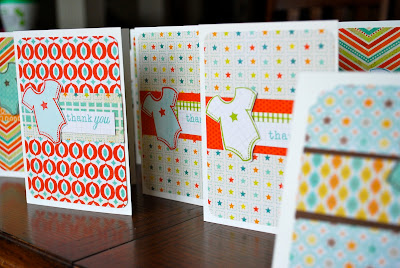
In the last couple of weeks, I have found some time to get creative.  Some friends of ours have welcomed their first baby.  I remember in the weeks after the girls were born, the mountain of gifts that arrived at our door seemed endless.  And, I also remember the seemingly insurmountable task of writing all those deserved thank you notes.  Half that battle was buying the thank you's - yep, that's right.  When you are three weeks out from having a baby (or babies) and you are running on 3-4 hours sleep, BUYING cards is not out of the question.  My mom made some thank you's for me and I did make a trip to Target to buy some.  Anyway, the point of the story was that I made a group of thank you's for our friend - postage stamps included.  I feel like I've made enough greetings to create a house of cards!  Hopefully this will help her with the task.
The cardstock is from Paper Source and the papers are a mixed bag of the 6x6 pads I had in my collection:


Hope you are having a great Tuesday!  Until next time - 
natalie

Wednesday, February 27, 2013

Party Popper Birthday Greeting

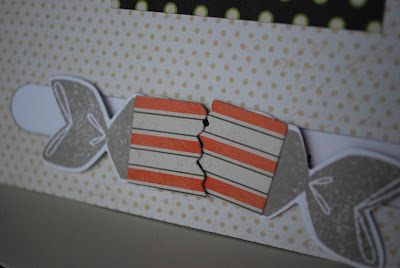
My mom's birthday was yesterday and I made her a birthday greeting using PaperTrey Ink's Movers & Shakers die and the corresponding stamp set featuring a party popper.


Since I wanted the front to say a little more than just "Birthday," I combined the "Birthday" sentiment with the "wishes" sentiment from another stamp set.  And, I even added a spot for how many years she is celebrating this year.


Inside, there is a riddle - "What goes up and never comes down?"


The party popper is cut with a corresponding die and then it is assembled in a "channel" so that both ends can separate and reveal and message behind.


Ta-Da!


Happy Wednesday!
natalie

Friday, February 15, 2013

Age Is Just A Number

I'm really enjoying my new PaperTrey Ink Movers and Shakers Sentiment stamp set (you can buy it here.)  They are so wonderful, I even use the sentiments by themselves on a card - without the movers and shakers die.
This card was created for my aunt who recently celebrated her 65th birthday.  


Most of the numbers pictured are low...10, 11, 12, 18, 19, 24....I hope she feels this young.  Afterall, age is just a number!


The envelope is lined with a corresponding paper.  I love lining envelopes.  It gives the card an extra special touch.  I used the envelope lining template from Paper Source and corresponding envelopes in superfine soft white.


Speaking of age, I had a dr.'s appointment yesterday and there were a couple of questions that I had about some issues...My doctor asked, "well, how old are you?"  And I had to think about it!  And then for a second, when my brain arrived at the right answer and I uttered the number aloud, I thought to myself, "Really?  That can't be right."  But, I guess it is.  And I have to remind myself again, age is just a number.  Seems like the phrase is easier to swallow when you're telling it to someone else.
Happy Friday!
natalie
ps. - can anyone tell me why a pacifier can stay in a baby's mouth for an extended amount of time (20, 30, 40 minutes!) while they are being held, but the minute they hit the crib, they can't seem to hold onto it?  It's a mystery to me.

Thursday, February 14, 2013

Happy Valentine's Day - Card #2

Happy Valentine's Day to all of you!  Hope you have something special planned.  This year, our day will be a little less than last year's.  Hard to believe that almost 1 year ago, after 1 failed IVF round, we were just weeks away from finding out that our dreams of having a family were going to come true!  And, a little over a month after that, we would find out that we were going to be doubly blessed with two beautiful babies!
Yep, our romantic dinner may include a trip to Red Robin, where screaming children aren't frowned upon.  Or maybe, a fabulous Pioneer Woman bacon wrapped filet.  I vote for the second...cooking, even with clean-up, always trumps a anxious trip to the outside.
As promised, here is the 2nd Valentine's Day greeting that I made.  


Still using that new Movers & Shakers Zipper die from PaperTrey Ink.  You can purchase it here.


The heart was cut out and stamped using Hero Arts stamping and die combo.  Then, I embossed the chevron with clear embossing powder.  Red and white bakers twine from The Twinery came in handy to dress up the plain cardstock.  The patterned cardstock is by Authentique.


On the inside, I made a pop-up sentiment and adhered another heart to the corner.

Have a love-filled day!
xo
natalie

Wednesday, February 13, 2013

Happy Valentine's Day - Card #1

Valentine's Day is almost here!  Hard to believe that on this romantic holiday, 12 years ago, a 26-ish young man got down on his knee in a local pizza parlor and asked a 23-ish something girl to marry him.  That young man of course, was my husband.  And, that girl was me!  Nearly 11 years of marriage later, we are still hitched!  So, you see, it is a very memorable and sentimental holiday for me.

Sneaking away from the girls for a little creative time, I was able to make some valentines to send.  This card was inspired by Betsy Veldman's chalkboard technique.  The way she does this is totally awesome, and since the chalkboard thing is so "in" right now, I decided to use it on this card.  (If you have any questions about how to do this, her tutorial is wonderful - just follow the link!)

First I cut some hearts out of red and craft cardstock.  Hero Arts has some great new stamping sets that include a cutting die - so you can cut out the shape and then stamp on it.  After I cut out the hearts, I used the cardstock piece that was left as a stencil to make my heart pattern as a background on my card.  I love using a foam makeup sponge to blend different shades of red together.  The variegated hearts look so pretty.


After I made the background, I stamped the black piece of cardstock with frost white ink and then embossed it with white Zing embossing powder.  Then, I stamped the same image again moving my stamp to the right ever so slightly to give it a "shadow" effect.  Then, I used a dry paper towel and rubbed the cardstock lightly to create a dusty, chalky kind of look.


Then I used my white Signo pen (the best!) to embellish the stamp and draw so lines around my sentiment.

 For the inside, I used a Movers & Shakers Zipper die from PaperTrey Ink.  You can purchase it here.  I love "interactive cards."  When someone receives this, they can "pull here" on the little zipper tab to reveal a special message.  PaperTrey Ink has a variety of stamps that can be used to stamp under the zipper part - but I decided to write my own message.
I wrote - "Happy Valentine's Day!"...I know, very original.
Next, I took one of the hearts that I cut out with the Hero Arts die and I rolled it through my Cuttlebug using the swiss dots embossing folder.  That's what makes the raised dots.  Then, for added detail, I lightly brushed over the dots with some red ink.  Then, I adhered it to the red cardstock on the inside of the card.


Hope you are looking forward to tomorrow and you get everything your heart desires!
xo
natalie
ps- come back tomorrow for Happy Valentine's Day - Card #2

Monday, February 4, 2013

Card #17 - Thank You with a little sparkle

Card #17- Thank You with a little sparkle

Using that good old circle punch again!  The paper is by Authentique.  The sentiment is a letterpressed card from Paper Source.  Then I ran a little line of stickles around the outside for added detail.


I'm missing my creative job at Paper Source.  But, I wouldn't trade the time with the girls for anything right now.  There will be a time when I can get back to being creative on a more regular basis.  

Happy Monday!
natalie
ps - if you don't already know, you can click on any card picture to enlarge it and see the detail!

Friday, February 1, 2013

Card #16 - Thank You with circles

Card #16 - Thank You with Circles
A circle punch can be a very hand tool - especially when you are trying to make a fast card.  The small circles were cut out using a punch, the larger circle was cut using a nestability.  I ran the small circles through my baby x to adhere them and used foam squares to really make my scalloped circle pop.  Then, I just ran a little ink around the edge of the card to dress up the plain white cardstock. The paper is by Bo Bunny.


Happy weekend to you!
natalie

Thursday, January 31, 2013

Card #15- Wishing You Sunshine

Card #15- Wishing You Sunshine

Another card creation using stamps from PaperTrey Ink.  I also used two different sized scalloped nestabilities to cut the circles and the paper is by Cosmo Cricket.  I embellished the detail on the umbrella with stickles.


Have a great Thursday!
natalie

Monday, January 28, 2013

Card #14 - Just A Note

Card #14 - Just A Note
The cardstock backing is an A2 Chartreuse card by Paper Source.  I cut the place for the sentiment from cardstock using a nestability and then inking around the edge.  The pattern paper is by Cosmo Cricket and then I embellished the design with turquoise stickles.  The edge of the green paper was cut using a Martha Stewart border punch.

Friday, January 25, 2013

Card #13 - You're The Best

Card #13 - You're The Best!
The sentiment is embossed on pearl paper courtesy of Paper Source.  The patterned papers are from a 6x6 stack by Authentique.  I buy most of my papers from A Cherry On Top.  They have a great selection of 6x6 pads as well at regular 12x12 papers and accessories.  

Thursday, January 24, 2013

Card #12 - Scalloped Thanks

Card #12 - Scalloped Thanks
Nestabilities are such a great tool when you are looking to jazz up a place to stamp your sentiment.  After I cut the shape, I stamped it and then stickled around the edge.  The paper is by Basic Grey.  The scalloped edge at the bottom was cut using a Martha Stewart punch.

Wednesday, January 23, 2013

Card #11- The Sky Is The Limit

Card #11 - The Sky is the Limit
Another creation made possible by the use of stamps by Paper Trey Ink.  Sometimes, stamping is all you need - no fuss.

Tuesday, January 22, 2013

Card #10 - You Did It! - Simple

Card #10- You Did It! - Simple

Sometimes, simple is best.  And, when you are creating 30 cards, the simple and quick creations are welcomed.  The paper is by Cosmo Cricket (and, by the way, I buy 6x6 pads almost exclusively because you get most of the papers from the collection and the prints are smaller which is PERFECT for cardmaking!)  
The circles were made with a punch and then I ran them through the baby x and adhered them to the card.  Then, I embellished them with stickles.

Monday, January 21, 2013

Card #9 - Butterfly Thank You

Card #9 - Butterfly Thank You
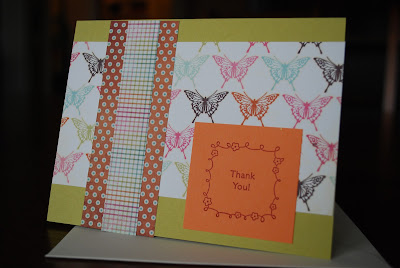
The paper used here is by My Mind's Eye.  The sentiment is from Paper Source and is embossed.


Friday, January 18, 2013

Card #8 - Cup of Tea

Card #8 - Cup of Tea
I can't seem to get away from using stamps by Paper Trey Ink.  They are wonderful, not only because they are economical, but also because they are CLEAR - which means you can see through them and they are easy to use. 
The paper used is by Cosmo Cricket and the twine is from The Twinery.  They have a great Facebook page where they post new colors and specials all the time.

Thursday, January 17, 2013

Card #7 - You're In My Thoughts

Card #7 - You're In My Thoughts
I adore Martha Stewart corner and border punches.  They add so much to any greeting.  The paper for this card is by Cosmo Cricket.

Wednesday, January 16, 2013

Card #6 - Violet Thank You

Card #6 - Violet Thank You
Violet is a color that is hard for me to use in greetings.  I don't know why, but I tend to stay away from it, but I love it here.  The paper is from My Mind's Eye and the sentiment is an embossed piece from Paper Source.

Tuesday, January 15, 2013

Card #5 - Planted in My Heart

Card #5 - Planted in My Heart.
Another fun greeting made by stamps from Paper Trey Ink.  I used the corresponding dies to cut out the gloves.  The paper is Cosmo Cricket.

Monday, January 14, 2013

Card #4 - Cheerful Happy Birthday

Card #4 - Cheerful Happy Birthday using Nestabilities to cut out the shape for the sentiment.  The circles were cut from Bo Bunny paper using a circle punch and adhered after being run through the baby xyron.

Friday, January 11, 2013

Card #3 - Hot Air Thank You

Card #3 - My favorite stamps come from Paper Trey Ink.  I just love their designs and how you can make so many different creations from one stamp set.  They are also very reasonably priced.